Guides · Builds
Character builds: weapons, artifacts, talents & constellations
A Genshin build is four choices that feed the damage formula: weapon, artifact set, talent priority, and which constellations actually pay off. This guide ranks each option by computed damage impact rather than popularity, and every ranking is reproducible in the damage calculator.
Weapon rankings, computed — not guessed
Most guides tell you a weapon is "best" without numbers. Here each weapon is run through the same damage engine on the character’s reference panel (level 90, talent 10, recommended artifacts, no team buffs). The top weapon is 100% — every other row shows the real percentage you leave on the table by using it instead.
Hu Tao
Vaporize damage| Dragon's Bane BEST | 3,657 | 100% |
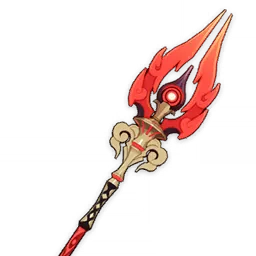
| Staff of Homa | 3,488 | 95.4% |
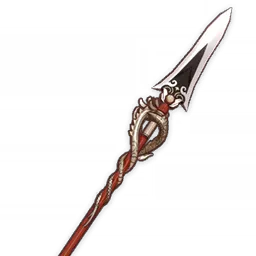
| Deathmatch | 3,478 | 95.1% |

Raiden Shogun
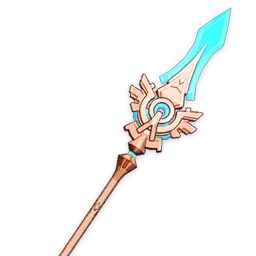
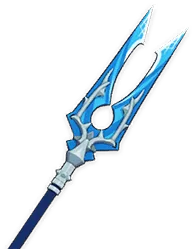
raw damage| Skyward Spine BEST | 3,365 | 100% |
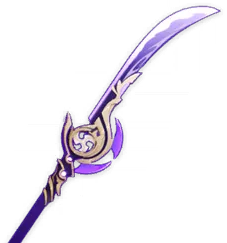
| Engulfing Lightning | 3,145 | 93.5% |
| The Catch | 2,819 | 83.8% |
Neuvillette
raw damage| Lost Prayer to the Sacred Winds BEST | 23,046 | 100% |
| Tome of the Eternal Flow | 18,762 | 81.4% |
| Sacrificial Fragments | 18,002 | 78.1% |



Ganyu
Melt damage| Amos' Bow BEST | 9,266 | 100% |
| Skyward Harp | 7,867 | 84.9% |
| Aqua Simulacra | 6,003 | 64.8% |



Kamisato Ayaka
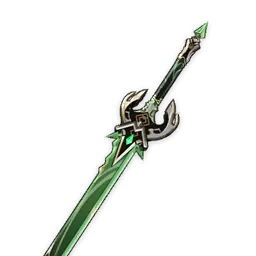
Melt damage| Primordial Jade Cutter BEST | 5,128 | 100% |
| The Black Sword | 4,440 | 86.6% |
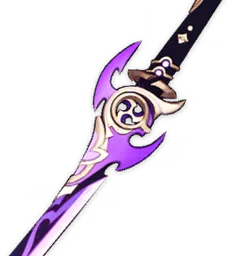
| Mistsplitter Reforged | 4,382 | 85.5% |

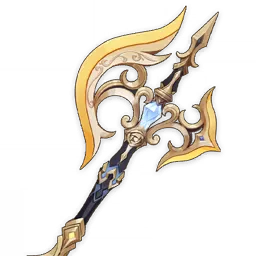
Xiao
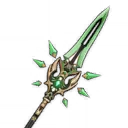
raw damage| Primordial Jade Winged-Spear BEST | 4,282 | 100% |
| Staff of Homa | 4,168 | 97.3% |
| Deathmatch | 3,562 | 83.2% |
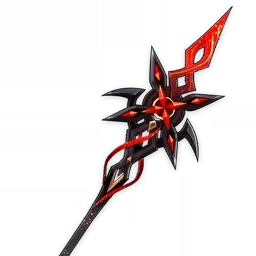
Arlecchino
Vaporize damage| Crimson Moon Semblance BEST | 6,632 | 100% |
| Deathmatch | 5,740 | 86.6% |
| Staff of Homa | 5,389 | 81.3% |
Xiangling
Vaporize damage| Dragon's Bane BEST | 3,707 | 100% |
| Staff of Homa | 3,656 | 98.6% |
| The Catch | 3,125 | 84.3% |
Alhaitham
raw damage| Mistsplitter Reforged BEST | 6,523 | 100% |
| The Black Sword | 6,042 | 92.6% |
| Light of Foliar Incision | 5,770 | 88.5% |

Navia
raw damage| Wolf's Gravestone BEST | 5,575 | 100% |
| Verdict | 4,728 | 84.8% |
| Serpent Spine | 4,128 | 74.0% |

Numbers are computed at equal refinement (R1) with no artifacts and no external buffs, so they reflect the weapon’s own value. Team buffs, refinements and artifacts will shift the gaps — swap the weapon in the calculator’s Gear panel to get your personal number.
Artifact sets, at a glance
The set you farm decides your damage ceiling. Here is every meta 4-piece set, what it does, and who it is for — pick the set that matches the reaction your team actually triggers.

Emblem of Severed Fate
2pc: +20% ER · 4pc: Burst DMG +25% of ER (up to +75%)
Best for: Raiden Shogun, Xiangling, Yelan, Xingqiu, Beidou, Mona
The default for any Burst-focused character. ER becomes a damage stat.

Crimson Witch of Flames
2pc: +15% Pyro DMG · 4pc: Vaporize/Melt multiplier up
Best for: Hu Tao, Diluc, Klee, Gaming
Best on Vaporize and Melt Pyro carries.

Marechaussee Hunter
2pc: +15% NA/CA DMG · 4pc: up to +36% Crit Rate on HP change
Best for: Neuvillette, Lyney, Wriothesley, Gaming
The free Crit Rate lets you stack Crit DMG hard.

Blizzard Strayer
2pc: +15% Cryo DMG · 4pc: +20% Crit Rate vs Cryo, +20% more vs Frozen
Best for: Ayaka, Freeze Ganyu
With Cryo Resonance you can stop at ~45% Crit Rate.

Golden Troupe
2pc: +20% Skill DMG · 4pc: +25% more, doubled off-field
Best for: Furina, Fischl, Yae Miko, Albedo
The off-field damage king — not for on-field carries.

Gilded Dreams
2pc: +80 EM · 4pc: ATK% or EM from party elements
Best for: Alhaitham, Cyno, Tighnari, Kaveh
Best on reaction carries who want both EM and damage.

Deepwood Memories
2pc: +15% Dendro DMG · 4pc: −30% enemy Dendro RES
Best for: Nahida, Collei, Yaoyao, any Dendro support
One Dendro unit must hold this in every Dendro team.

Obsidian Codex
2pc: +15% DMG · 4pc: +40% Crit Rate after Nightsoul use
Best for: Mavuika, Kinich, Chasca, Mualani, Varesa
The Natlan carry set — massive Crit Rate on demand.

Viridescent Venerer
2pc: +15% Anemo DMG · 4pc: Swirl shreds 40% enemy RES
Best for: Kazuha, Sucrose, Venti, any Anemo support
The single highest-value support set in the game (~+28% team damage).

Noblesse Oblige
2pc: +20% Burst DMG · 4pc: party +20% ATK after Burst
Best for: Bennett, Diona, Shenhe, Rosaria
The classic team-buff set for supports.

Husk of Opulent Dreams
2pc: +30% DEF · 4pc: stacking DEF + Geo DMG
Best for: Arataki Itto, Albedo, Noelle
The DEF-scaling Geo carry set.

Fragment of Harmonic Whimsy
2pc: +18% ATK · 4pc: +DMG under Bond of Life
Best for: Arlecchino, Clorinde
Tailor-made for Bond of Life mechanics.

Tenacity of the Millelith
2pc: +20% HP · 4pc: party +20% ATK +30% shield
Best for: Zhongli, Layla
Best on shielders who want to buff the whole team.

Heart of Depth
2pc: +15% Hydro DMG · 4pc: +30% NA/CA after Skill
Best for: Tartaglia, Kamisato Ayato
The on-field Hydro carry set.
A common mistake is farming a set that does not match your team’s reaction — e.g. building Crit on a Bloom trigger or using Gilded Dreams on a Freeze carry. Identify which reaction your team triggers, then farm the set above that feeds it.
Constellation value, ranked
Not every constellation is worth your primogems. The tables below show the approximate damage gain of each constellation for popular carries, so you can see exactly where the breakpoints are before you pull. Gains are community-sourced estimates for a typical end-game build — your exact number depends on your stats and team.
Raiden Shogun
pull to C2C2 is one of the best single constellations in the game — her Burst ignores 60% of enemy DEF.
| C1 | +5% | Resolve stacks faster. |
| C2 | +40% | Burst ignores 60% DEF. |
| C3 | +15% | Burst talent +3. |
| C4 | +5% | Party ATK% after Burst. |
| C5 | +3% | Skill talent +3. |
| C6 | +10% | Burst cooldown reduction. |
Hu Tao
pull to C1C1 removes charged-attack stamina cost — a big damage and comfort gain. Best QoL constellation in the game.
| C1 | +20% | No stamina cost on charged attacks. |
| C2 | +10% | Blood Blossom damage up. |
| C3 | +10% | Skill talent +3. |
| C4 | +5% | Party Crit Rate after kill. |
| C5 | +8% | Burst talent +3. |
| C6 | +15% | Near-death guaranteed Crit. |
Furina
pull to C2C2 dramatically speeds up her Burst stacking, unlocking her full team DMG bonus far faster.
| C1 | +10% | Starts with more Fanfare. |
| C2 | +30% | Fanfare stacks much faster. |
| C3 | +15% | Burst talent +3. |
| C4 | +8% | Energy refund. |
| C5 | +5% | Skill talent +3. |
| C6 | +40% | Unlocks on-field DPS mode. |
Nahida
pull to C2C2 lets Dendro reactions crit — a huge team-wide buff for Bloom, Hyperbloom and Quicken teams.
| C1 | +5% | Burst counts extra elements. |
| C2 | +25% | Dendro reactions can Crit. |
| C3 | +10% | Skill talent +3. |
| C4 | +8% | EM from linked enemies. |
| C5 | +5% | Burst talent +3. |
| C6 | +30% | On-field bonus hits. |
Neuvillette
pull to C1C1 grants interruption resistance and a stacking DMG bonus — the single best QoL breakpoint for him.
| C1 | +15% | Interruption resistance + DMG. |
| C2 | +10% | Bonus Crit DMG per stack. |
| C3 | +15% | Normal attack talent +3. |
| C4 | +5% | Extra droplet generation. |
| C5 | +5% | Burst talent +3. |
| C6 | +40% | Extended charged attack. |
Mavuika
pull to C2C2 is a large, always-on damage spike for both her Burst and off-field support.
| C1 | +10% | More Night Soul uptime. |
| C2 | +25% | Burst and support damage up. |
| C3 | +15% | Burst talent +3. |
| C4 | +5% | Consistent buff uptime. |
| C5 | +3% | Skill talent +3. |
| C6 | +35% | Massive Burst nuke upgrade. |
Arlecchino
pull to C1C1 adds interruption resistance and bonus damage — a strong early breakpoint.
| C1 | +15% | Interruption resistance + DMG. |
| C2 | +10% | Skill upgrade. |
| C3 | +12% | Normal attack talent +3. |
| C4 | +5% | Bond of Life management. |
| C5 | +5% | Burst talent +3. |
| C6 | +40% | Massive Burst nuke upgrade. |
Kamisato Ayaka
pull to C4C4 shreds 30% DEF on her Burst — the highest-value breakpoint for Freeze Ayaka.
| C1 | +8% | Skill cooldown reduction. |
| C2 | +15% | Two extra Burst blades. |
| C3 | +15% | Burst talent +3. |
| C4 | +25% | Burst shreds 30% DEF. |
| C5 | +5% | Skill talent +3. |
| C6 | +20% | Charged attack nuke. |
The rule of thumb
A new character almost always beats a constellation unless that constellation is a documented breakpoint. The breakpoints that actually matter are the ones that ignore DEF (Raiden C2, Ayaka C4), let reactions crit (Nahida C2), remove a core limitation (Hu Tao C1, Neuvillette C1), or speed up a stacking mechanic (Furina C2). Most C3, C4 and C5 constellations are small — verify before you spend.
What to level first
A talent level is a guaranteed 6-7% damage increase with zero RNG — yet most players farm artifacts for weeks first. Level talents in this order and you will gain more damage per resin than almost any artifact upgrade.
Raiden Shogun
Burst > Skill > NormalQ to 10 (her whole kit), E to 9 for the team Burst buff, normal attacks optional.
Hu Tao
Normal > Skill > BurstNormal to 10 — her charged attacks are the entire build. Skill to 9, Burst to 9.
Neuvillette
Normal > Skill > BurstNormal (charged attack) to 10 first, Skill and Burst to 9 after.
Furina
Skill > Burst > NormalSkill to 10 (main off-field damage), Burst to 9-10 for the team buff, normal unused.
Arlecchino
Normal > Skill > BurstNormal to 10 (her only damage source), Skill to 8-9, Burst to 8.
Mavuika
Burst > Skill > NormalBurst to 10 (the nuke), Skill to 9 for off-field support, normal optional.
Navia
Skill > Burst > NormalSkill to 10 (the umbrella shotgun is her damage), Burst to 8-9, normal optional.
Nahida
Skill > Burst > NormalSkill to 10 (her entire kit), Burst to 8-9, normal unused.
Zhongli
Skill > Burst > NormalSkill to 9-10 for the shield, Burst to 8-9 for the nuke, normal unused.
Bennett
Burst > Skill > NormalBurst to 10 (his buff scales with it), Skill to 8 for energy, normal unused.
Xiangling
Burst > Skill > NormalBurst to 10 (Pyronado is everything), Skill to 8, normal unused.
Alhaitham
Skill > Burst > NormalSkill to 10 (drives the projection attacks), Burst to 9, normal to 8.
Kamisato Ayaka
Burst > Normal > SkillBurst to 10 (the bulk of her damage), Normal to 9, Skill to 8.
Yelan
Burst > Skill > NormalBurst to 10 (off-field Hydro), Skill to 9, normal unused.
The universal rule: the talent your character actually deals damage with goes to 9 or 10 first, and the talents they never use can stay at level 1. If you are unsure, hover the character’s note in the roster above — it names their signature skill.
Why this calculator is different
The big three calculators (Aspirine, Genshin Optimizer, paimon.app) are all excellent — but they are built for hardcore optimizers who enjoy entering sub-stats. This tool optimizes for the other 90%: getting a trustworthy damage number and a clear next step in under 30 seconds.
| Feature | This tool | Aspirine | Optimizer | paimon.app |
|---|---|---|---|---|
| Zero-input presets (pick a character → instant reference damage) | Yes | No | No | No |
| Every value editable by hand (level, weapon, set, multiplier) | Yes | No | Partial | Yes |
| Weapon rankings computed by the engine (not text) | Yes | No | No | Partial |
| Constellation value tables (C1–C6 gain) | Yes | Partial | No | No |
| Artifact set & talent priority cheat sheets | Yes | No | No | Partial |
| Full artifact optimizer (scan → auto-best build) | No | No | Yes | Partial |
| No account, no manual sub-stat entry required | Yes | No | No | Yes |
| Mobile-friendly responsive layout | Yes | No | Partial | Yes |
Honest note on what this is NOT
Genshin Optimizer is the better tool if you want to scan your entire artifact inventory and solve for the mathematically optimal set. This calculator does not do full inventory optimization — instead it answers the faster questions: "what can this character hit?", "which weapon is better?", "is that constellation worth it?", and "what should I level next?". Use both: this page for quick decisions, Optimizer for deep artifact solving.
Compare your own build
Load any character preset and swap weapons, artifacts and multipliers to see the exact damage difference before you spend resin.